Monday, February 13, 2012

Valentine's Day cookies

Here are some Valentine's Day cookies. I made some chocolate chip (not pictured) oatmeal raisin, and sugar cookie.

For the sugar cookies, I made the dough, rolled the dough out, chilled the dough and then cut out the shapes and baked them. While the cookies were cooling I made the royal icing. I piped the border around each cookie and then I took some royal icing and thinned it out with some water, to make a royal icing flood for the cookies. I then added the thinned out royal icing (flood) and spread it onto the cookies evenly with a toothpick. I let them dry overnight.

That same night I made some chocolate cameos. I bought this really cool candy cameo mold, so I used that as my chocolate mold. I had vanilla bark and chocolate bark. I melted some vanilla bark and used that for the facial features, I took a toothpick and made sure to only fill those areas with the white vanilla bark, then I popped the candy mold into the fridge. I added some pink pedal food coloring dust into the remaining white bark to make pink and then melted some chocolate bark.

After the facial feature layer was firm, I added the background color. I did a few chocolate backgrounds and a few pink. My favorite was the pink. And then I popped the mold back into the fridge. They firmed up very quickly, so I popped them out of the mold and put them into a container.

The next morning I decorated the cookies. I used a few different techniques and I'm happy with how they turned out.


Oatmeal raisin cookies


Cherry blossom themed birthday cake.

Here is a photo of a cherry blossom birthday cake that I did for my sister. The cake was red velvet and the frosting was cream cheese. I had many many many struggles with this cake, from the consistency of the frosting to the leveling of the cakes, to the homemade fondant, to the tearing and cracking of the fondant. I am not very proud of this cake. I did like the way the cherry blossoms came out though.


Marshmallow fondant tutorial

Here's a tutorial on how to make your own marshmallow fondant. The tutorial will save you alot of money, but it is extremely time consuming and may lead to arthritis of the hands.. just kidding.. kind of.


Start out with marshmallows, powdered sugar and water. The shortening is for kneading .


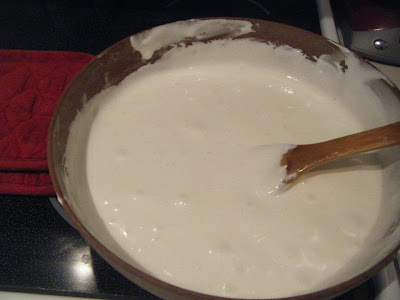
Add marshmallows and water into a microwave safe bowl and microwave, stir, microwave, stir. microwave, stir, until the mixture looks like fluff.


Here is your melted marshmallow mixture


Add enough powdered sugar for the mixture to come together.


Add some more powdered sugar. Keeping on adding until mixture is somewhat malable.


Pour some powdered sugar onto the counter with the shortening and then take the marshmallow mixture, place onto of the powedered sugar. Make sure your hands are completely clean and then coat your hands in a thin layer of shortening, to prevent the marshmallow mixture from sticking to your hands. Then start to knead. This should only take you about.... 4 hours.


I take small sections and add the powdered sugar until I've reached the texture that I want. And then repeat.


My finished fondant, before it has been colored


You will need tons of paper towels. Not a hand towel, because they have lint. A clean paper towel after every hand wash. Wash your hands often, so that the fondant is free of clumps of powdered sugar. I went though a whole roll and I washed my hands about 50 times.


After hurricane fondant. During the fondant coloring process, I kept what I wasn't coloring or working on covered, under a bowl, because fondant dries out very quick. Can you spot Kaspa? Hint, look at the pile of paper towels.


Finished Fondant.